Show List
Publish a jar to Nexus Maven Repo
In this example we will be create a jar from a Java project and publishing it to local Maven repository on Nexus.
Setting up Nexus
Follow the steps provided in the tutorial running-nexus-application-docker-image to spin up Nexus on docker.
When the application is up, it can be accessed from url http://localhost:8081/
Log in with admin credentials. The admin password can be found on the server file as explained in the tutorial view-docker-application-server-files
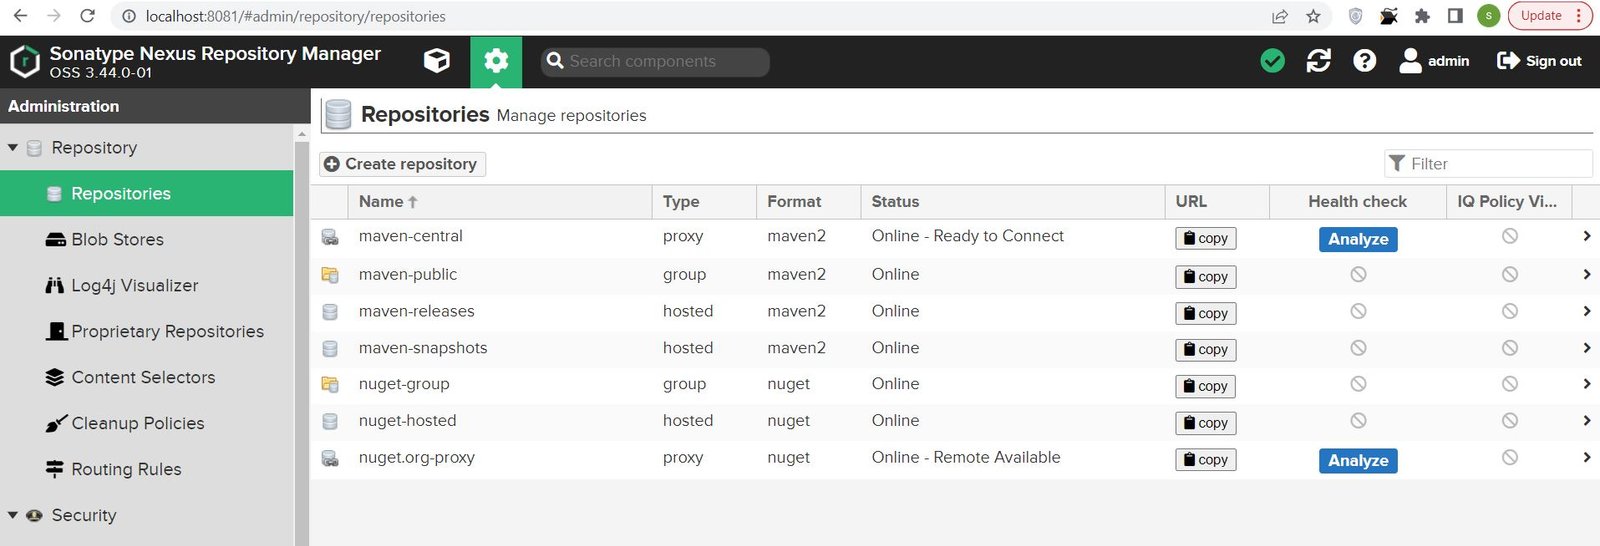
Once logged in you should be able to view the repositories from url http://localhost:8081/#admin/repository/repositories
Project Structure
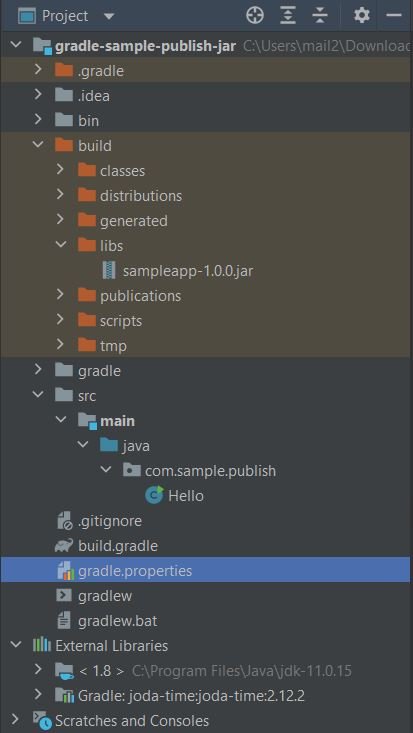
Here is the Java project structure we will be building. We will use gradle to create the jar and then upload that to the Maven repo. On the IDE you can start with creating a new Gradle Java project or import the source code from the link provided at the end of this tutorial page.
Here is the Java class used in the project. The class simply displays the current time using the joda library
Hello.java:
package com.sample.publish;

import org.joda.time.LocalTime;

public class Hello
{
    public static void main(String args[])
    {
        LocalTime currentTime = new LocalTime();
        System.out.println("com.sample.publish.Hello World. The time now is " + currentTime);
    }
}
build.gradle
This gradle file is using application plugin to build the project and create jar. Maven-publish plugin is used to publish the jar.
apply plugin : "application"
apply plugin: "maven-publish"
group 'com.sample'
version '1.0.0'

repositories {
    // Define where the dependencies are to be looked for
    mavenCentral()
}

dependencies {
    //Jars the application is dependent on
    implementation "joda-time:joda-time:2.12.2"
}

jar {
    archivesBaseName = 'sampleapp'
    enabled = true
    manifest {
        attributes(
                "Implementation-Title": project.name,
                "Implementation-Version": project.version,
                "Implementation-Timestamp": new Date(),
                "Main-Class": "com.sample.publish.Hello"
        )
    }

    from {
        configurations.runtimeClasspath.collect { it.isDirectory() ? it : zipTree(it) }
    }
}

publishing {

    repositories {
        maven {
            def releasesRepoUrl = "http://localhost:8081/repository/maven-releases/"
            def snapshotsRepoUrl = "http://localhost:8081/repository/maven-snapshots/"
            url = version.endsWith('SNAPSHOT') ? snapshotsRepoUrl :  releasesRepoUrl

            //because we are using http connection to local nexus repo
            allowInsecureProtocol = true

            credentials {
                username = nexusLocalUsername
                password = nexusLocalPassword
            }
        }
    }
    publications {
        maven(MavenPublication) {
            artifact ("build/libs/sampleapp-$version" + ".jar"){
                extension  'jar'
            }
        }
    }
}
gradle.properties
This file contains the credentials for the nexus repo
nexusLocalUsername=yournexususername
nexusLocalPassword=yournexuspassword
Publishing
Run the command "gradle clean build publish" from project root to build and then to publish the jar.
PS C:\Users\mail2\Downloads\gradle-sample-publish-jar> gradle clean build publish

BUILD SUCCESSFUL in 2s
8 actionable tasks: 8 executed
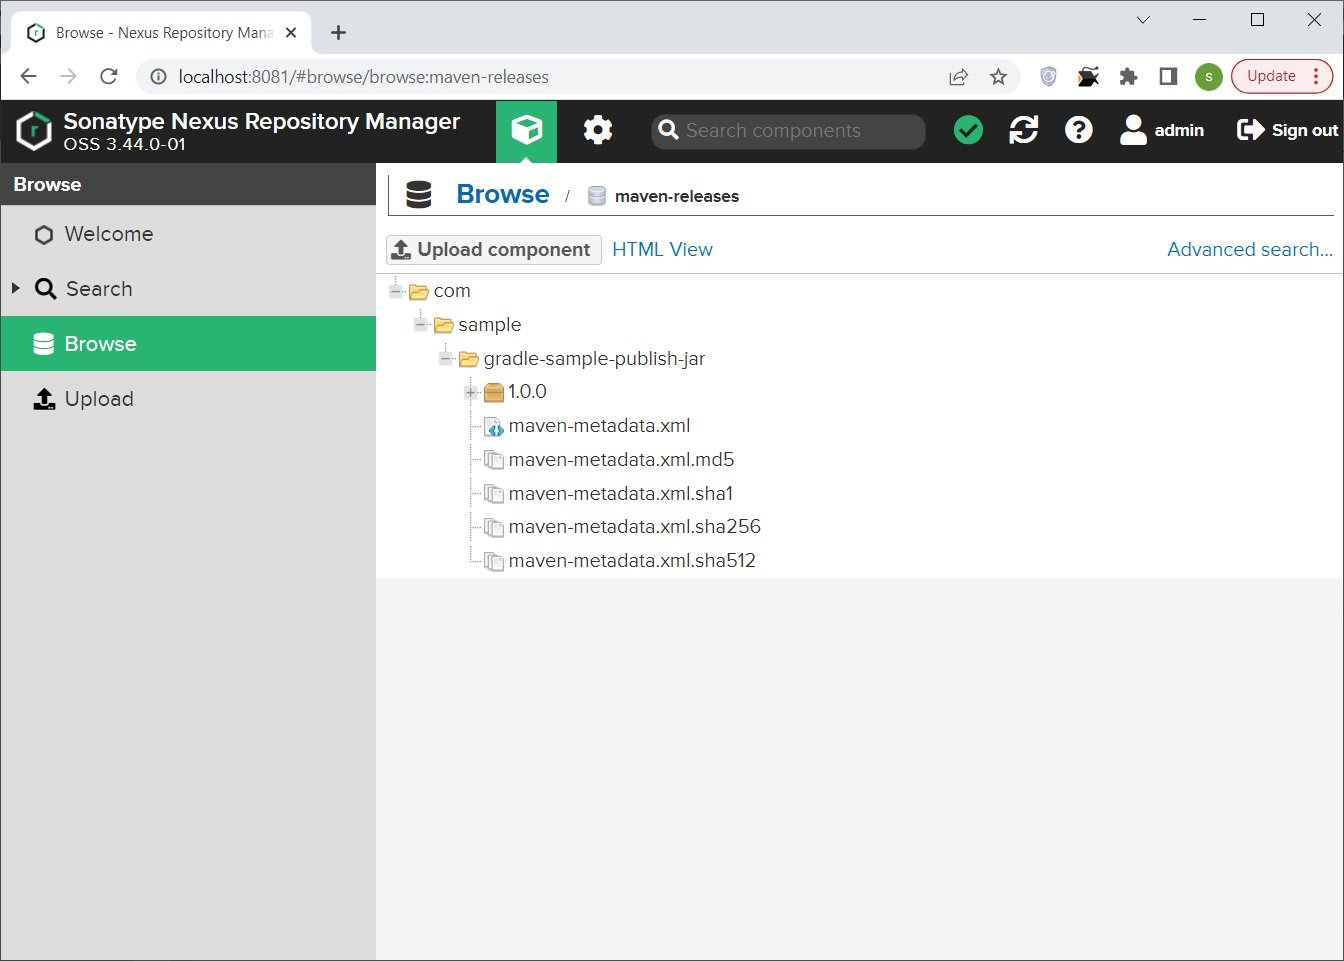
After the command is successfully completed, the published jar can be found on nexus:
Source Code:
https://github.com/it-code-lab/gradle-sample-publish-jar
Leave a Comment