Environment Set Up
Here is a general overview of the steps involved in setting up a Gradle project:
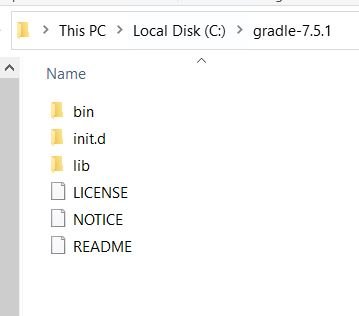
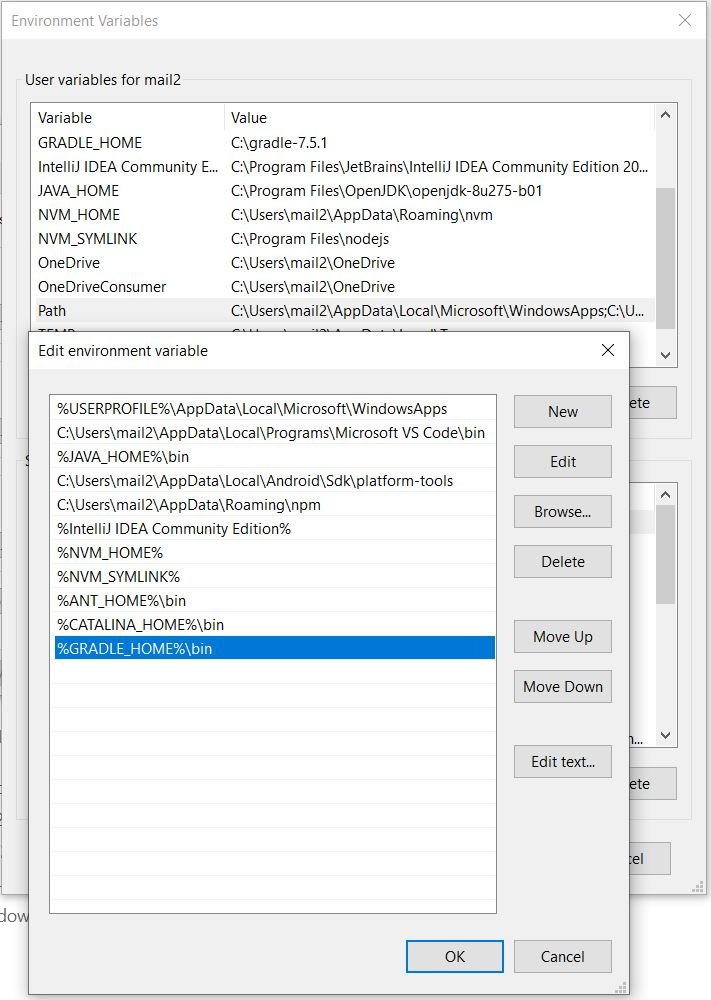
Install Gradle: Before you can start using Gradle, you need to have it installed on your system. You can download the latest version of Gradle from the official website and follow the instructions for installation.
Create a new project directory: Next, you need to create a new directory for your project. This can be done through the terminal or command prompt.
Initialize the Gradle project: To initialize the Gradle project, you can run the following command in the terminal or command prompt:
gradle init. This will create the necessary files and directories for your project.Configure build.gradle: The build.gradle file is the main configuration file for a Gradle project. In this file, you can define the dependencies, tasks, and configurations for your project. For example, you can specify the version of Java you want to use, the dependencies you need to include, and any custom tasks you want to run.
Add dependencies: Gradle makes it easy to manage dependencies for your project. You can specify the dependencies you need in the build.gradle file, and Gradle will download and include them automatically.
Compile and run the code: Once you have set up the build.gradle file and added any necessary dependencies, you can compile and run your code by using the following command:
gradle build. This will compile your code and run any tests you have defined.Use Gradle tasks: Gradle provides a number of tasks that you can use to manage and build your project. Some common tasks include
gradle buildto compile and build your code,gradle testto run tests, andgradle cleanto clean the build directory.
Install Gradle
C:\Users\mail2>gradle -v

Welcome to Gradle 7.5.1!

Here are the highlights of this release:
 - Support for Java 18
 - Support for building with Groovy 4
 - Much more responsive continuous builds
 - Improved diagnostics for dependency resolution

For more details see https://docs.gradle.org/7.5.1/release-notes.html


------------------------------------------------------------
Gradle 7.5.1
------------------------------------------------------------

Build time:   2022-08-05 21:17:56 UTC
Revision:     d1daa0cbf1a0103000b71484e1dbfe096e095918

Kotlin:       1.6.21
Groovy:       3.0.10
Ant:          Apache Ant(TM) version 1.10.11 compiled on July 10 2021
JVM:          1.8.0_275 (Oracle Corporation 25.275-b01)
OS:           Windows 10 10.0 amd64
Leave a Comment